Master ergonomic keyboard position with expert tips on wrist angle, desk height, tilt, and split keyboards. Reduce strain and type comfortably all day.
Products Mentioned
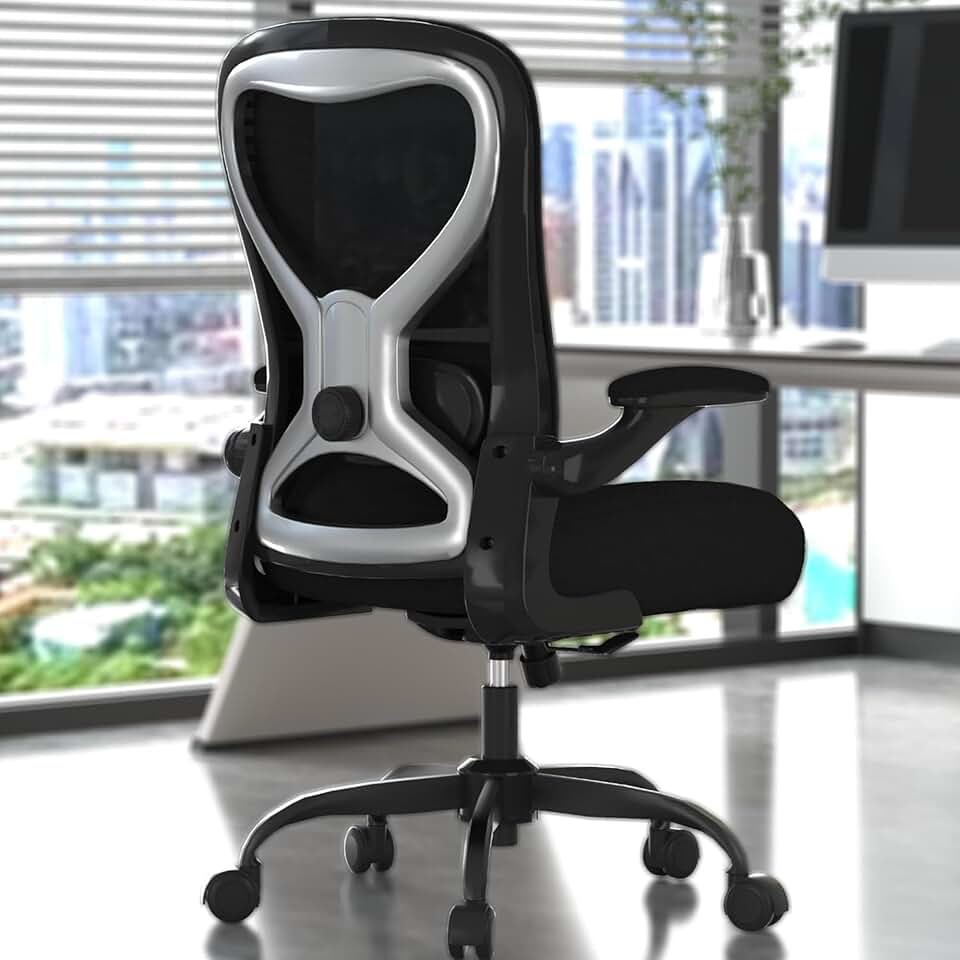
Office Desk Chair
Solid $90 ergonomics for 6-hour days - nothing more, nothing less
As an Amazon Associate, we earn from qualifying purchases.
Ergonomic Keyboard Position - The Complete 2026 Guide
If your wrists ache after a long workday, your shoulders creep up toward your ears, or you find yourself hunching forward to reach your keyboard, your setup is working against you. Getting your ergonomic keyboard position right is one of the highest-impact changes you can make to your workstation - and the good news is that most fixes cost nothing but a few minutes of adjustment.
This guide covers everything from elbow angles and desk height to keyboard tilt, split keyboards, and where to put your mouse. We'll also point you toward specific products and setups that make proper positioning easier to maintain.
Why Ergonomic Keyboard Position Matters
Repetitive strain injuries (RSIs) like carpal tunnel syndrome, tendinitis, and shoulder impingement are among the most common workplace injuries in 2026. The vast majority are preventable. Poor keyboard placement puts continuous low-grade stress on your wrists, forearms, elbows, and shoulders for hours at a time - and that stress compounds.
Proper positioning:
Keeps joints in their neutral, low-stress range of motion
Reduces muscle fatigue in the forearms, neck, and upper back
Lowers your long-term risk of developing chronic pain or RSI
Improves typing accuracy and endurance
The core principle is simple - your body should be relaxed and balanced, not braced or stretched. Let's build that position from the ground up.
Featured
Office Desk Chair
Solid $90 ergonomics for 6-hour days - nothing more, nothing less
Everything downstream - keyboard height, monitor height, mouse position - depends on getting your chair and desk dialed in first. Skip this step and even a $400 ergonomic keyboard won't save your wrists.
Setting Chair Height Correctly
Sit back fully in your chair and adjust the height until:
Feet are flat on the floor (or on a footrest)
Thighs are roughly parallel to the floor
Knees are at approximately 90 degrees
Once your legs are set, let your arms hang naturally at your sides. Your elbows should fall right at the height of your keyboard or just slightly above it.
Desk Height Recommendations
For most people, the right desk height depends on their height. Use this as a starting reference:
User Height
Recommended Desk Height
5'0" - 5'3" (152-160 cm)
23" - 25" (58-64 cm)
5'4" - 5'7" (163-170 cm)
25" - 27" (64-69 cm)
5'8" - 5'11" (173-180 cm)
27" - 29" (69-74 cm)
6'0" - 6'3" (183-191 cm)
29" - 31" (74-79 cm)
6'4"+ (193 cm+)
31"+ (79 cm+)
Standing desks with programmable height memory - like the Flexispot E7 Pro (around $549) or the Uplift V2 (starting at $599) - make it easy to hit your exact number every time, whether you're sitting or standing.
Expert tip - If your desk is fixed and slightly too tall, raise your chair and use a footrest to keep your feet supported. A simple Amazon Basics Adjustable Foot Rest (around $25) does the job well. If the desk is too low, monitor risers or a keyboard tray can compensate.
For a deeper look at optimizing your full workstation, check out our desk setup guide.
Step 2 - The Core Ergonomic Keyboard Position Rules
With your chair and desk set, here's exactly how to position your keyboard.
Elbows at 90 Degrees
This is the foundation. Your upper arms should hang relaxed at your sides, not pushed forward or flared out. Elbows should be bent at approximately 90 degrees, with forearms parallel to the floor. This is the same principle as the 90-degree knee angle - joints at neutral, muscles relaxed.
If you have to raise your shoulders to reach the keyboard, it's too high. If you have to hunch forward to reach it, it's too far away.
Wrists Straight and Neutral
Your wrists should form a straight line with your forearms - no bending up (extension), down (flexion), or to either side (ulnar or radial deviation). This neutral position keeps pressure off the carpal tunnel and the tendons running through your wrist.
The most common wrist mistakes:
Wrists bent upward - usually caused by a keyboard that's too high or tilted the wrong way
Wrists bent downward - less common, but happens with trays set too low
Wrists cocked sideways - happens when reaching for keys at the edges of a wide keyboard, or when the mouse is too far away
Keyboard Distance and Placement
The keyboard should sit close enough that your elbows stay at your sides - not stretched out in front of you. A good rule of thumb is that your elbows should remain within a few inches of your body while you type. If you're reaching, pull the keyboard closer.
Avoid typing over a hard desk edge. Resting your forearms on a sharp edge cuts off circulation and increases pressure on the underside of the wrist. Either use a keyboard tray that positions your arms correctly, or make sure there's enough depth to the desk that your forearms rest on a flat surface - not the edge.
ELABEST X100 Mesh Chair with Footrest
17-point adjustability and a footrest at $320 - finally a tall-person chair that delivers
This is one of the most overlooked aspects of ergonomic keyboard position, and one of the most important.
Flat or Negative Tilt - What to Aim For
Most keyboards ship with fold-out legs on the back that prop the rear of the keyboard up. This is positive tilt - and for most people, it makes wrist posture worse, not better. When the back of the keyboard is raised, your wrists bend upward (extension) to reach the keys.
The ideal positions are:
Flat - keyboard completely level, no tilt
Negative tilt - keyboard angled slightly away from you, so the far keys are lower than the near keys
Negative tilt encourages your wrists to stay straight or even slightly flexed downward, which is the most neutral and comfortable position during extended typing.
Tilt Type
Wrist Effect
Recommended?
Positive tilt (back raised)
Forces wrist extension
No
Flat (no tilt)
Neutral, comfortable
Yes
Negative tilt (front raised)
Encourages neutral to slight flexion
Yes - best option
How to Achieve Negative Tilt
If your current desk doesn't allow it, a keyboard tray with negative tilt adjustment is the most effective solution. The 3M Adjustable Keyboard Tray AKT180LE (around $89) and the Humanscale 6G Keyboard System (around $149) both offer smooth negative tilt and bring the keyboard below desk height where it belongs.
Some ergonomic keyboards, like the Logitech MX Keys S (around $109) and the Microsoft Sculpt Ergonomic Keyboard (around $79), have a gently curved design that inherently reduces wrist stress - though pairing them with a tray still gets you optimal positioning.
Expert tip - Fold down those keyboard legs if you've been using them. Try typing flat for a week. Most people find their wrist fatigue decreases noticeably within a few days.
Step 4 - Consider a Split or Ergonomic Keyboard
A standard flat keyboard forces your hands inward toward the centerline of the board, which means your wrists have to rotate outward (pronation) and often bend sideways (ulnar deviation) to type. Over thousands of keystrokes a day, that adds up.
How Split Keyboards Help
Split keyboards divide the key layout into two halves - either physically separate or connected by a hinge - and angle each half outward so your hands can rest in a more natural position with thumbs pointing slightly inward. This reduces:
Shoulder inward rotation
Forearm pronation
Ulnar deviation at the wrist
2026's Top Ergonomic Keyboards
Keyboard
Type
Price
Best For
Microsoft Sculpt Ergonomic
Fixed split, cushioned palm rest
~$79
Budget-friendly ergonomic intro
Logitech Ergo K860
Curved split, wrist rest included
~$129
Most people upgrading from standard
Kinesis Freestyle Pro
Fully separable split
~$199
Customizable shoulder-width placement
Dygma Defy
Fully split, tented, wireless
~$329
Power users, heavy customization
ZSA Moonlander Mark II
Split, columnar, fully adjustable
~$365
Enthusiasts, coders, max ergonomics
Logitech MX Keys S
Standard form, low-profile
~$109
Mild improvement, familiar feel
For most people making their first ergonomic upgrade, the Logitech Ergo K860 hits the sweet spot - it's comfortable out of the box, widely available, and dramatically better than a standard keyboard for wrist positioning. The included wrist rest is one of the better integrated designs on the market, though we'll cover wrist rest nuances in a moment.
For those who want maximum control over hand position, the Kinesis Freestyle Pro lets you slide the two halves apart to match your exact shoulder width. Pair it with the Kinesis VIP3 Accessory Kit (around $39) for tenting (angling the halves upward) and negative tilt together.
Ergonomic Office Chair
Solid $189 starting point - not your forever chair
Your keyboard position and mouse position are inseparable. Getting one right while neglecting the other still leaves you with imbalanced strain.
Mouse Placement Rules
Place the mouse immediately next to the keyboard on the same surface at the same height
Keep it within easy reach so you don't have to extend your arm or raise your shoulder to use it
Upper arm should stay close to your body while mousing - no reaching
Use a light grip - many people unknowingly clench their mouse, creating forearm tension
The Numpad Problem
Standard full-size keyboards with a numpad push the mouse far to the right, which means you're constantly reaching and elevating your right shoulder. Over the course of a day, this is a significant source of neck and shoulder tension.
The fix is simple - switch to a tenkeyless (TKL) or compact keyboard and add a separate numpad when you need it.
Keyboard Form Factor
Mouse Distance from Midline
Shoulder Impact
Full-size (with numpad)
Far right
High shoulder strain potential
Tenkeyless (TKL)
Moderately closer
Noticeably improved
75% or compact
Close to midline
Optimal
A great pairing is the Logitech MX Keys Mini (around $99) with the Logitech MX Master 3S mouse (around $99). Both are low-profile, precise, and designed to work together comfortably.
If you use a numpad regularly, the Lofree Numpad (around $45) or the Keychron Q0 Plus Numpad (around $89) can be placed to the left of your keyboard instead - leaving your mouse hand with a clear, close path.
Expert tip - Try moving your numpad to the left side of your keyboard for a week. It feels strange at first, but your right shoulder will thank you. Many accountants and data-entry professionals swear by it.
Wrist rests are one of the most misunderstood ergonomic accessories. The short version - they're often used wrong, and that makes things worse.
The Right Way to Use a Wrist Rest
Wrist rests are not designed for use while actively typing. They're designed for use during brief pauses - the moments when your hands rest between bursts of typing. During active typing, your hands should be floating lightly above the keys, wrists straight and slightly elevated.
Problems caused by resting wrists on a pad while typing:
Compresses the carpal tunnel area
Encourages wrist extension (upward bend)
Can cause you to pivot from the wrist rather than moving your whole arm
When Wrist Rests Are Helpful
A wrist rest helps if it:
Is soft and level with the keyboard surface (not higher)
Is used only between keystrokes, not during them
Keeps your wrist in a straight, neutral line - not propped up
The best options we've tested include the Gimars Upgrade Gel Wrist Rest (around $19), which is low-profile and firm enough to avoid sinking, and the Kensington ErgoSoft Wrist Rest (around $24), which pairs well with tenkeyless keyboards.
Putting It All Together - Full Ergonomic Keyboard Position Checklist
Use this checklist every time you set up at a new desk or reassess your current position:
Posture and Chair
Feet flat on floor or footrest
Knees at approximately 90 degrees
Thighs roughly parallel to the floor
Back supported by chair lumbar
Head balanced over spine, not jutting forward
Keyboard Position
Keyboard at elbow height or just slightly below
Elbows bent at approximately 90 degrees
Upper arms relaxed at sides - no reaching or shoulder raise
Wrists straight and neutral - no upward, downward, or sideways bend
Keyboard close enough that elbows stay near body
Keyboard on flat surface or keyboard tray - not over a hard edge
Keyboard Tilt
Back legs folded down - keyboard flat or with negative tilt
No positive tilt (propped back)
Mouse
Mouse immediately next to keyboard on same height surface
Can reach mouse without raising shoulder or extending arm
Light grip - not clenching
Wrist Rest
Used only during typing pauses, not active typing
Level with keyboard surface
Wrists straight when resting, not angled upward
Common Ergonomic Keyboard Position Mistakes to Avoid
Even people who know the rules often fall into these traps:
Using the keyboard's prop-up legs - As covered above, this promotes wrist extension. Fold them down.
Keyboard too far from the body - The keyboard shouldn't sit at the back of the desk. Pull it forward so your elbows stay at your sides.
Mouse too far right - A numpad-equipped keyboard is the usual culprit. Consider going tenkeyless.
Typing with wrists resting on the desk - Feels comfortable short-term but increases carpal tunnel pressure during the keystroke motion.
Ignoring chair height to match the desk - Many people adjust their keyboard to their desk rather than adjusting their desk and chair to their body. Start from the body outward.
Setting and forgetting - Your optimal position may shift as you switch between tasks, from laptop to desktop, or as your workday progresses. Check in with your posture periodically.
Veken 55 Electric Standing Desk
55 inches of sit-stand utility for $114 - but the wobble is real
Proper ergonomic keyboard position isn't about buying the most expensive gear - it's about understanding your body and working with it rather than against it. The single biggest change most people can make is adjusting their chair height and desk height so elbows sit at the right level, then folding down those keyboard legs and pulling the keyboard closer.
From there, upgrading to a compact or split keyboard, adding a keyboard tray for negative tilt, and placing the mouse right next to the board will cover the remaining 80% of common strain issues.
Make the changes gradually, give your body a week to adapt to each adjustment, and pay attention to how your shoulders, wrists, and neck feel at the end of the workday. The feedback is clear once you're in the right position.
FITUEYES Height Adjustable Standing Desk 36” Wide Sit to Stand Converter Stand...
36 inches wide, $143, no cables - the no-nonsense sit-stand converter
The correct ergonomic keyboard position has your elbows bent at approximately 90 degrees with upper arms relaxed at your sides, forearms parallel to the floor, and wrists straight and neutral - no bending up, down, or sideways. The keyboard should be at elbow height, close enough that you don't have to reach, and ideally flat or angled with a slight negative tilt so the far edge is lower than the near edge.
For most people, a keyboard should be flat or angled with a slight negative tilt - meaning the far edge is lower than the near edge. This encourages neutral or slightly flexed wrists, which reduces strain. Avoid positive tilt (propping up the back with the fold-out legs), as this forces your wrists into upward extension, increasing pressure on the carpal tunnel over time.
Your keyboard should be at approximately elbow height when you're seated correctly - chair at the right height, feet flat on the floor, thighs parallel to the ground. This typically means the keyboard sits just at or slightly below elbow level, allowing your forearms to be parallel to the floor without raising your shoulders or hunching forward. A keyboard tray can help achieve this if your desk is fixed at a less-than-ideal height.
Yes, for most people split keyboards offer a real ergonomic benefit. Standard flat keyboards force your hands inward and your forearms to rotate inward (pronation), which can cause ulnar deviation and shoulder tension over time. Split keyboards allow each hand to angle outward slightly, reducing forearm pronation and keeping wrists straighter. The benefit is most noticeable for heavy typists or anyone who already experiences wrist or shoulder discomfort. The Logitech Ergo K860 (around $129) is a popular starting point.
Your mouse should sit immediately next to your keyboard on the same surface at the same height. The goal is to keep your upper arm close to your body when mousing - no reaching or shoulder elevation. One of the biggest culprits for poor mouse position is a full-size keyboard with a numpad, which pushes the mouse far to the right. Switching to a tenkeyless or compact keyboard brings the mouse closer to your body's midline and noticeably reduces shoulder strain.
Wrist rests are best used during pauses in typing, not during active keystrokes. While typing, your hands should float lightly above the keys with wrists straight. Resting your wrists on a pad during active typing can compress the carpal tunnel area and encourage poor wrist angles. If you do use a wrist rest, choose one that is low-profile, firm rather than squishy, and level with the keyboard surface - not higher than it.
The ideal desk height depends on your body - typically between 23 and 31 inches depending on how tall you are. The goal is for your keyboard to sit at elbow height when you're seated correctly. For someone around 5'8" to 5'11", that usually means a desk height of around 27 to 29 inches. A height-adjustable desk like the Flexispot E7 Pro (around $549) lets you dial in the exact number. If your desk is fixed, use chair height adjustment and a footrest to compensate.
Proper keyboard position significantly reduces your risk of developing carpal tunnel syndrome and other repetitive strain injuries, though it doesn't guarantee prevention. The main goal is to keep wrists in a neutral, straight position during typing and to avoid prolonged pressure on the carpal tunnel area. Combining good keyboard position with regular breaks, stretching, and appropriate typing force gives you the strongest protection against RSI over the long term.
The best ergonomic keyboard position keeps your elbows at 90-110 degrees, your wrists straight (not bent up or down), and the keyboard close enough that your upper arms hang naturally at your sides. Your forearms should be roughly parallel to the floor or angled slightly downward toward the keys. Most ergonomists recommend a negative tilt of 5-10 degrees, achieved with an adjustable tray like the Humanscale 6G, to maintain that neutral wrist position throughout the workday.
The four core keyboarding posture rules are: keep wrists neutral and flat (not flexed or extended), position the keyboard at or just below elbow height, sit with your back supported and feet flat on the floor, and keep the keyboard close enough to avoid reaching. Breaking any one of these consistently - especially typing with bent wrists or a raised keyboard - significantly increases cumulative stress on tendons and nerves over time.
An ergonomic keyboard can reduce the repetitive strain that aggravates tendonitis, but it does not treat the condition itself - consult a medical professional first. Split keyboards like the Kinesis Freestyle Pro or Logitech Ergo K860 reduce ulnar deviation, which is one of the main mechanical causes of wrist tendon irritation. Paired with correct keyboard height and neutral wrist positioning, switching to an ergonomic layout often reduces symptom flare-ups for people with repetitive strain injuries.
Ergonomic keyboards can make typing more comfortable for people with arthritis by reducing the joint angles and finger extension required on a standard flat keyboard. Low-profile keyboards with light actuation switches - such as the Logitech MX Keys, which requires only 45g of force per key - minimize stress on inflamed joints compared to stiff mechanical boards. A split or tented keyboard can also reduce the forearm rotation that strains wrist and finger joints, though individual results vary depending on the type and severity of arthritis.