Master office chair posture with our 2026 guide. Learn seat height, lumbar support, spinal alignment, and daily habits that keep back pain away for good.
Products Mentioned
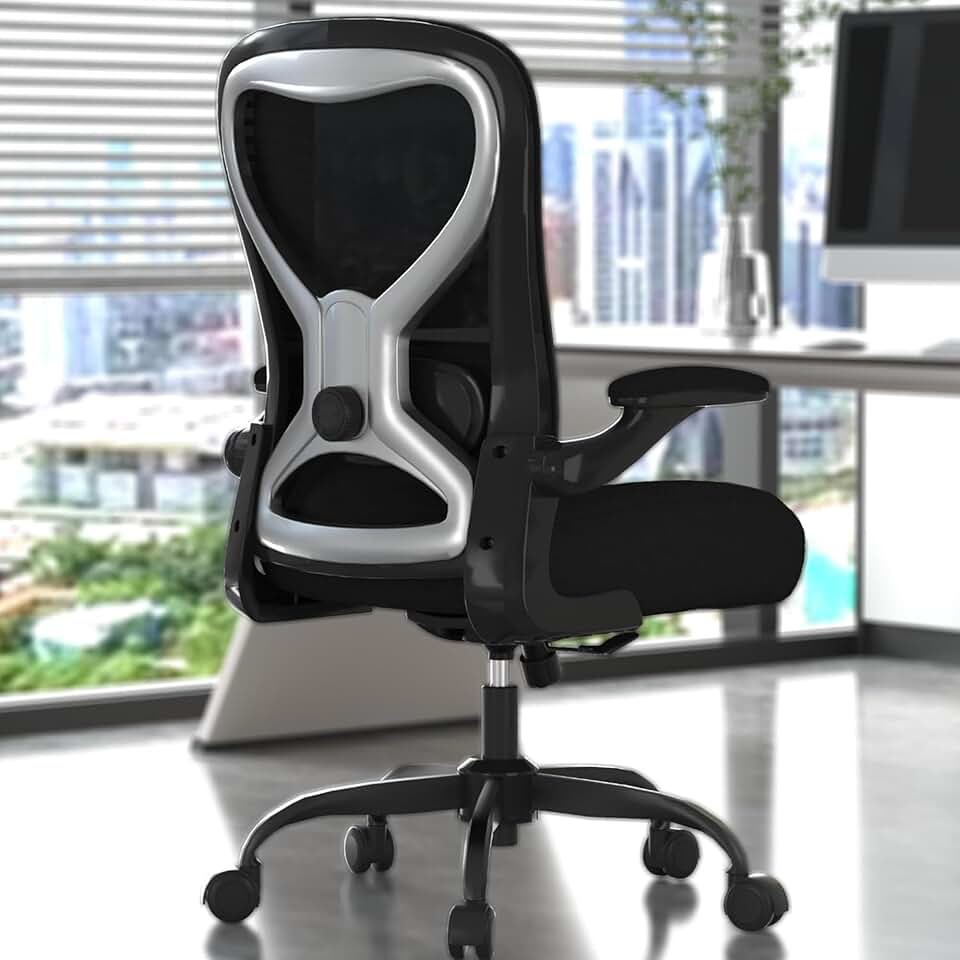
Office Desk Chair
Solid $90 ergonomics for 6-hour days - nothing more, nothing less
If you've ever finished a workday with a stiff neck, aching lower back, or numb legs, your office chair posture is almost certainly the culprit. The good news is that fixing it doesn't require an expensive specialist visit or a complete office overhaul. A few targeted adjustments to how you sit and how your workstation is set up can make a dramatic difference within days.
This guide walks you through everything you need to know about office chair posture in 2026, from seat height and lumbar support to monitor placement and movement habits. We'll also give you a quick posture check you can run right now at your desk.
Why Office Chair Posture Matters More Than Ever
Remote and hybrid work is now the norm for tens of millions of people, which means more hours spent sitting at home desks that were often not designed with ergonomics in mind. According to the World Health Organization, prolonged static sitting is a genuine health risk, and no chair in the world can fully offset a completely sedentary day. That said, sitting correctly in a well-fitted chair dramatically reduces the strain on your muscles, spinal discs, and joints compared to sitting poorly.
OSHA defines a neutral posture as one where your joints are naturally aligned, minimizing stress on muscles, tendons, and your skeletal system. That definition is the foundation of everything in this guide.
Featured
Office Desk Chair
Solid $90 ergonomics for 6-hour days - nothing more, nothing less
Seat height is the single most important adjustment you'll make. Get this wrong and every other setting compensates for a broken foundation.
How to find your ideal seat height:
Sit fully back in the chair so your lower back touches the lumbar support.
Place both feet flat on the floor.
Check that your thighs are roughly parallel to the ground.
Your knees should form a comfortable angle close to 90 degrees, though anywhere from 90 to 110 degrees is acceptable.
There should be no pressure under your thighs from the seat edge cutting in.
If your feet dangle when your thighs are parallel, you need a footrest rather than lowering the chair (which would bring your knees above your hips and tilt your pelvis). If your knees are significantly higher than your hips even at the lowest seat position, the chair may genuinely be too tall for your body, and a seat height range of 15 to 19 inches covers most people but not everyone.
Tall or short? Check out our roundup of ergonomic chairs sorted by seat height range to find options that actually fit your body.
Step 2 - Getting Lumbar Support Right
The lumbar region is your lower back, specifically the inward curve that sits just above your pelvis. When you slouch, that curve flattens or reverses, compressing the front of your spinal discs and pulling on the muscles along your spine.
Proper lumbar support should:
Sit snugly in the natural inward curve of your lower back
Not push your upper back forward or force an exaggerated arch
Feel like a gentle, supportive presence rather than an intrusive lump
Adjustable vs. fixed lumbar support
Type
Best For
Limitation
Fixed lumbar
Budget chairs, average-height users
One-size positioning rarely fits everyone
Height-adjustable lumbar
Most users, mixed teams
Still one depth setting
Height and depth adjustable
Wide range of body types
Higher price point
Dynamic lumbar (follows movement)
Active sitters, long sessions
Requires learning period
Chairs like the Herman Miller Aeron, the Steelcase Leap V2, and the HM Embody all offer dynamic or highly adjustable lumbar systems. If you're on a tighter budget, the Autonomous ErgoChair Pro and the Hbada E3 offer reasonable lumbar adjustability in the mid-range segment. Browse the full comparison on our ergonomic chairs page.
Ergonomic Office Chair
Solid $189 starting point - not your forever chair
Step 3 - Aligning Your Spine and Setting Seat Depth
Your spine has three natural curves: inward at the neck (cervical), outward at the upper back (thoracic), and inward again at the lower back (lumbar). A good sitting posture preserves all three rather than collapsing any of them.
Seat depth plays a bigger role here than most people realize. Here's how to check yours:
Sit fully back in the chair.
Look at the gap between the back of your knees and the front edge of the seat.
You want roughly 2 to 3 fingers of clearance (about 2 to 3 inches).
If the seat is too long, it presses into the back of your knees and forces you to sit forward, losing lumbar contact.
If the seat is too short, it doesn't fully support your thighs, leading to pressure concentration at the back of your legs.
Most quality chairs offer a seat depth adjustment, typically a sliding seat pan that moves forward and backward independently of the backrest.
Step 4 - Armrest Positioning for Shoulder and Neck Health
Poorly adjusted armrests are a surprisingly common source of neck and shoulder pain. Here's what to aim for:
Height - Set armrests so your elbows rest lightly on them with your shoulders completely relaxed and not shrugged upward. Your upper arms should hang naturally.
Width - Armrests should be close enough that you're not reaching outward to rest on them, but not so narrow they squeeze your sides.
Angle - If your chair has pivoting armrests, angle them slightly inward to match your natural arm position when typing.
The armrest test: Rest your elbows on the armrests and then check your shoulders. If they've crept up toward your ears even slightly, lower the armrests. Shrugged shoulders are one of the leading causes of upper trapezius tension in desk workers.
ELABEST X100 Mesh Chair with Footrest
17-point adjustability and a footrest at $320 - finally a tall-person chair that delivers
Your chair can only do so much if your monitor, keyboard, and desk aren't positioned correctly. Think of your chair as the base layer and your wider workstation setup as the system that determines your final posture.
Monitor Height and Distance
The top of your monitor should be at or just slightly below eye level.
Sit back naturally and extend your arm. Your fingertips should just about reach the screen, which puts it roughly 20 to 28 inches away for most people.
If you wear progressive lenses, you may need the monitor slightly lower to use the reading portion of the lens without tilting your head back.
Keyboard and Mouse Placement
Your keyboard should sit so that your elbows are at roughly 90 to 100 degrees and your wrists are flat or very slightly downward (negative tilt keyboards help here).
Your mouse should be as close to the keyboard as possible to prevent reaching and over-extending the shoulder.
Consider a keyboard tray if your desk height forces your arms too high. Check our desks guide for height-adjustable options that eliminate this problem entirely.
Desk Height
For seated work, most people need a desk surface between 28 and 30 inches high, though sitting desk height is really derived from your chair height rather than a fixed number. If you use a standing desk, a height-adjustable option lets you dial this in precisely. See our full desks roundup for recommendations across every budget.
Run through this checklist at your current desk setup:
Lower body
Feet flat on the floor (or on a footrest)
Thighs roughly parallel to the ground
Knees at approximately 90 to 110 degrees
2 to 3 finger gap between seat edge and back of knees
No numbness or pressure under thighs
Core and back
Lower back touching and supported by lumbar support
Natural inward curve preserved at lower back
Upper back gently supported, not pushed forward
Hips sitting slightly higher than or level with knees
Upper body
Shoulders relaxed, not shrugged
Elbows at 90 to 100 degrees
Wrists flat or slightly downward while typing
No forward reaching for keyboard or mouse
Head and neck
Head balanced over shoulders, not jutting forward
Eyes level with the top third of the monitor
No chin tuck or head tilt required to view the screen
If you checked fewer than 10 of these, your setup has meaningful room for improvement. If you checked fewer than 7, you're likely already accumulating the kind of muscular tension and joint stress that shows up as pain within weeks or months.
Office Desk Chair
Sub-$100 seating for shorter frames - honest about its limits
One of the biggest mistakes companies and individuals make is assuming a single chair works for everyone. A chair that fits a 5'4" person perfectly will likely fail a 6'2" person in seat height, seat depth, and lumbar position all at once. Body-specific chair fitting is not optional, it's the entire point.
Sitting on the Edge of the Seat
Perching on the front third of the seat feels alert and active, but it completely removes lumbar support contact and puts sustained strain on the hip flexors and lower back muscles.
Over-Relying on the Chair Alone
Research from the Cornell University Ergonomics Research Laboratory identified improper workstation setup as a leading source of discomfort complaints, even among workers with high-quality chairs. If your monitor is too low, too high, or too far away, your head and neck will compensate no matter how well your chair is adjusted.
Never Reclining
Many people lock their chair upright thinking that is the most professional or productive position. In reality, a slight recline between 100 and 110 degrees actually reduces disc pressure compared to sitting bolt upright at 90 degrees. High-quality chairs with recline ranges up to 145 degrees let you shift your center of gravity throughout the day, redistributing pressure and giving different muscle groups a break.
Ignoring Armrests Entirely
Leaving armrests at their default factory height often means they're either too high (causing shoulder shrugging) or too low (offering no support at all). Spend 60 seconds adjusting them properly.
Movement - The Missing Piece of the Posture Puzzle
The World Health Organization recommends regularly interrupting long periods of static behavior, and this applies even when your static posture is perfect. No chair, however well-fitted, eliminates the risks of sitting for eight unbroken hours.
Practical movement strategies for 2026:
The 30-30 rule - Every 30 minutes of sitting, take 30 seconds to stand, stretch, or walk briefly.
Micro-stretches at your desk - Neck rolls, seated cat-cow, and shoulder rolls take under two minutes and meaningfully relieve accumulated tension.
Standing desk intervals - If you have a height-adjustable desk, aim for 15 to 30 minutes of standing per hour, building up gradually to avoid leg fatigue.
Walk-and-talk - Take phone calls standing or walking whenever possible.
Recline deliberately - Use your chair's recline function intentionally during reading or video calls rather than sitting rigidly upright for every task.
For accessories that support better movement habits, including footrests, balance boards, and desk cycle pedals, visit our accessories page.
Choosing a Chair That Actually Supports Good Posture
Not every chair makes proper posture achievable. Here's what to look for:
Feature
Why It Matters for Posture
Adjustable seat height
Enables correct foot and knee positioning
Adjustable lumbar support
Fits the chair to your specific spinal curve
Seat depth adjustment
Prevents knee pressure and maintains lumbar contact
4D armrests
Allows precise elbow and shoulder positioning
Recline with tension control
Encourages healthy posture variation throughout the day
Breathable mesh or foam
Prevents heat buildup that causes restless shifting
Our curated list of ergonomic chairs includes detailed specs on all of these features so you can compare before you buy.
Final Thoughts
Good office chair posture isn't a rigid position you hold all day. It's a baseline alignment you return to regularly, combined with deliberate movement and a workstation setup that works with your body rather than against it. Take 10 minutes today to run through the posture check above, adjust your seat height and lumbar support, and set a reminder to stand up every 30 minutes. Those small changes, done consistently, compound into a genuinely healthier and more comfortable working life.
Ready to buy? Here are the products from this guide
The correct posture involves sitting fully back in the chair with your feet flat on the floor, thighs parallel to the ground, and knees at roughly 90 to 110 degrees. Your lumbar support should fill the natural inward curve of your lower back, your shoulders should be relaxed, and your eyes should be roughly level with the top third of your monitor. A slight recline of 100 to 110 degrees actually reduces disc pressure compared to sitting fully upright.
Sit fully back in the chair and feel for where the lumbar support contacts your back. It should sit snugly in the inward curve just above your pelvis, not at the middle of your back or pushing your upper body forward. If your chair has height-adjustable lumbar support, move it up or down until it gently fills that curve without creating an exaggerated or uncomfortable arch. It should feel supportive and almost unnoticeable, not like something poking into your back.
Your office chair should be set so that your feet rest flat on the floor, your thighs are roughly parallel to the ground, and your knees are at approximately 90 degrees. A good way to check is to sit fully back and ensure there's no pressure from the seat edge cutting into the back of your thighs. If your feet dangle at the correct thigh angle, add a footrest rather than lowering the chair, as dropping the seat too far raises your knees above your hips and tilts your pelvis forward.
A well-adjusted ergonomic chair significantly reduces the effort required to maintain good posture, but it can't fix problems created by a poorly set up workstation. If your monitor is too low, you'll hunch forward regardless of how good your chair is. If your desk is too high, your shoulders will shrug even with perfect armrest adjustment. Think of the chair as the foundation and your monitor height, desk height, and keyboard placement as the structure built on top of it. You need all of them working together.
A practical approach is the 30-30 rule, which means taking 30 seconds to stand, stretch, or walk briefly for every 30 minutes of sitting. The World Health Organization recommends regularly interrupting prolonged static behavior, and even very short movement breaks reduce accumulated muscular tension. You don't need long breaks to see benefits. Micro-stretches, standing up for a phone call, or simply reclining your chair and shifting your weight all count toward reducing the cumulative strain of a sedentary workday.
When you sit fully back in the chair so your lower back touches the lumbar support, there should be approximately 2 to 3 inches of clearance between the front edge of the seat and the back of your knees. This is roughly 2 to 3 fingers of space. If the seat is too long, it presses into the back of your knees and forces you to sit forward away from the lumbar support. If it's too short, your thighs lack full support and discomfort builds over time. Look for chairs with a sliding seat pan adjustment to fine-tune this.
Yes, armrests have a meaningful impact on neck and shoulder posture. If they're set too high, your shoulders shrug upward, creating sustained tension in the upper trapezius muscles that often shows up as neck pain by the end of the day. If they're too low, they offer no support and your arms create downward load on your shoulders over time. Set armrests so your elbows rest lightly on them with your shoulders completely relaxed and hanging naturally. If your chair has pivoting armrests, angle them slightly inward to match your natural arm position at the keyboard.
Sit with your hips pushed to the back of the seat, feet flat on the floor, and knees at roughly a 90-degree angle. Your lower back should contact the lumbar support, shoulders should stay relaxed and unpinched, and your monitor should sit at eye level to prevent neck strain. Think of it as stacking your joints - ears over shoulders, shoulders over hips.
The 90-90-90 rule means keeping your ankles, knees, and hips each bent at 90-degree angles while seated. It is a useful starting point for chair setup, but it is not a hard requirement - slight variations of 5 to 10 degrees at any joint are fine and often more comfortable for longer sessions. The bigger priority is avoiding sustained extreme angles, like hips below 80 degrees or knees locked straight.
A well-adjusted ergonomic chair can reduce sciatica flare-ups by relieving pressure on the sciatic nerve through proper lumbar support and a seat that does not compress the backs of the thighs. Chairs with a waterfall seat edge, like the Herman Miller Aeron or Steelcase Leap V2, are particularly effective because they reduce pressure behind the knees and improve circulation. That said, no chair replaces medical treatment - prolonged sitting in any chair typically aggravates sciatica, so frequent movement breaks remain essential.
After spinal fusion, prioritize a chair with firm, adjustable lumbar support positioned to maintain the natural lumbar curve without forcing movement at the fused segments - the Herman Miller Aeron and the Steelcase Gesture are frequently recommended by physical therapists for this reason. Seat height and tilt tension adjustments matter too, since you need to offload weight evenly without straining the surgical site. Always confirm chair selection with your surgeon or physical therapist, as recovery protocols vary depending on the fusion level and hardware used.